
Intro
Master video editing with 5 tips for Final Cut Pro, enhancing workflow, color grading, and audio design using advanced features and plugins.
Final Cut Pro is a powerful video editing software used by professionals and enthusiasts alike. With its wide range of features and tools, it can be overwhelming for new users to navigate. However, with the right techniques and strategies, you can unlock the full potential of Final Cut Pro and take your video editing skills to the next level. In this article, we will explore five tips to help you get the most out of Final Cut Pro.
To start, it's essential to understand the basics of Final Cut Pro. The software is designed to be user-friendly, with a intuitive interface that makes it easy to import, organize, and edit your footage. However, as you delve deeper into the world of video editing, you'll discover a wide range of advanced features and tools that can help you achieve professional-grade results. From color correction and audio editing to visual effects and motion graphics, Final Cut Pro has everything you need to create stunning videos that engage and captivate your audience.
Whether you're a seasoned pro or just starting out, Final Cut Pro is an excellent choice for anyone looking to create high-quality videos. With its robust feature set and user-friendly interface, it's the perfect tool for editing everything from short social media clips to feature-length films. So, if you're ready to take your video editing skills to the next level, let's dive in and explore five tips to help you get the most out of Final Cut Pro.
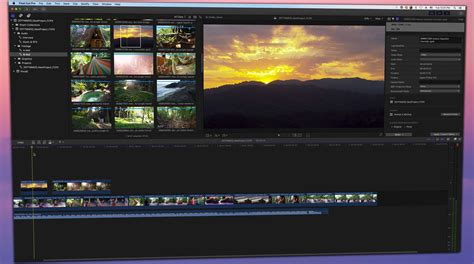
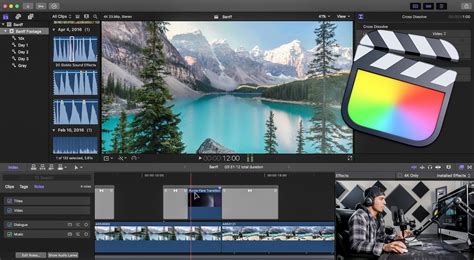
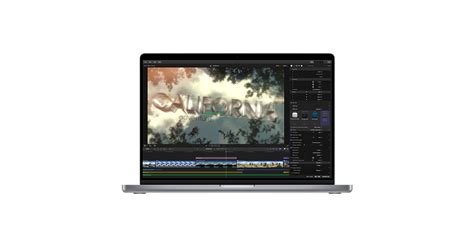
Understanding the Interface
To get the most out of Final Cut Pro, it's essential to understand how these different areas work together. For example, you can use the browser to select and import specific clips, and then use the timeline to assemble them into a cohesive edit. The inspector, meanwhile, allows you to make fine-tuned adjustments to your clips, ensuring that they look and sound their best.
Customizing the Interface
One of the great things about Final Cut Pro is its customizable interface. You can tailor the layout to suit your specific needs, hiding or showing different panels and windows as needed. This allows you to focus on the tasks at hand, without distractions or clutter.To customize the interface, simply go to the "Window" menu and select the panels you want to display. You can also use the "Command" key to toggle between different views, such as the browser and timeline. By customizing the interface to suit your workflow, you can work more efficiently and effectively, and get the most out of Final Cut Pro.
Organizing Your Footage

By organizing your footage in a logical and consistent way, you can quickly and easily find the clips you need, and avoid wasting time searching through hours of footage. You can also use the "Smart Collection" feature to automatically organize your clips based on criteria such as date, camera, and location.
Using Keywords and Tags
Keywords and tags are a powerful way to categorize and organize your footage in Final Cut Pro. By assigning keywords and tags to your clips, you can quickly and easily search for specific footage, and avoid having to sift through hours of unrelated material.To use keywords and tags, simply select the clip you want to label, and then go to the "Inspector" window. From here, you can add keywords and tags, as well as assign a rating and add notes. This allows you to add context and meaning to your footage, and makes it easier to find the clips you need.
Editing Your Footage
To edit your footage, simply select the clip you want to work with, and then use the "Inspector" window to make adjustments. You can also use the "Timeline" to assemble your edit, adding clips, transitions, and effects as needed.
Using Transitions and Effects
Transitions and effects are a great way to add visual interest and polish to your edit. Final Cut Pro offers a wide range of built-in transitions and effects, including fades, dissolves, and motion graphics.To use transitions and effects, simply select the clip you want to work with, and then go to the "Transitions" or "Effects" tab. From here, you can browse through the available options, and apply them to your clip. You can also use the "Inspector" window to customize the look and feel of your transitions and effects.
Color Correction and Grading

To color correct and grade your footage, simply select the clip you want to work with, and then go to the "Color" tab. From here, you can use the "Color Wheels" and "Curves" tools to make adjustments, and add a look or grade to your footage.
Using LUTs and Color Presets
LUTs (Look-Up Tables) and color presets are a great way to add a consistent look and feel to your footage. Final Cut Pro offers a wide range of built-in LUTs and color presets, including options for film, television, and social media.To use LUTs and color presets, simply select the clip you want to work with, and then go to the "Color" tab. From here, you can browse through the available options, and apply them to your clip. You can also use the "Inspector" window to customize the look and feel of your LUTs and color presets.
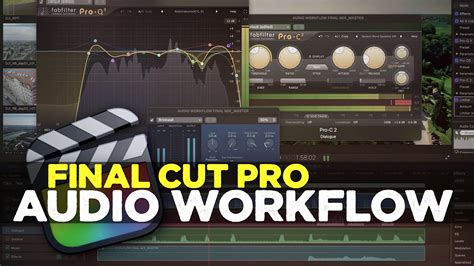
Audio Editing and Mixing

To edit and mix your audio, simply select the clip you want to work with, and then go to the "Audio" tab. From here, you can use the "Audio Inspector" to make adjustments, and add music and sound effects to your edit.
Using Audio Effects and Plugins
Audio effects and plugins are a great way to add depth and interest to your audio. Final Cut Pro offers a wide range of built-in audio effects and plugins, including options for reverb, delay, and distortion.To use audio effects and plugins, simply select the clip you want to work with, and then go to the "Audio" tab. From here, you can browse through the available options, and apply them to your clip. You can also use the "Inspector" window to customize the sound and feel of your audio effects and plugins.
Final Cut Pro Image Gallery


What is Final Cut Pro?
+Final Cut Pro is a professional video editing software developed by Apple.
What are the system requirements for Final Cut Pro?
+Final Cut Pro requires a Mac computer with macOS High Sierra or later, 8GB of RAM, and a dedicated graphics card.
How do I get started with Final Cut Pro?
+To get started with Final Cut Pro, simply import your footage, create a new project, and start editing.
What are some advanced features in Final Cut Pro?
+Some advanced features in Final Cut Pro include color correction, audio editing, and visual effects.
How do I export my final project in Final Cut Pro?
+To export your final project in Final Cut Pro, simply go to the "File" menu, select "Export", and choose your desired format and settings.
In
Final Thoughts

We hope you found this article helpful and informative. If you have any questions or comments, please don't hesitate to reach out. We'd love to hear from you and help you get the most out of Final Cut Pro. Additionally, if you're looking for more resources and tutorials on Final Cut Pro, be sure to check out our website and social media channels for the latest updates and tips. Happy editing!