
Intro
Boost project efficiency with a well-planned timeline. Discover 5 tips for creating a realistic project timeline, including scheduling, milestones, and resource allocation to ensure successful project management and timely completion.
Creating a project timeline is essential for the success of any project. It helps to outline the tasks, milestones, and deadlines, ensuring that everyone involved is on the same page. A well-planned project timeline can make all the difference in meeting deadlines, staying within budget, and delivering quality results. In this article, we will explore the importance of a project timeline and provide five tips to help you create an effective one.
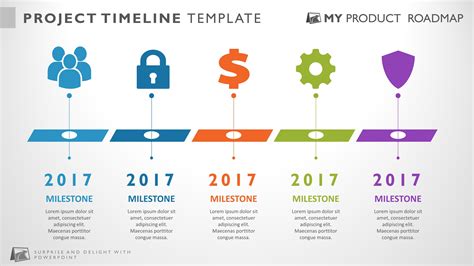
A project timeline is a visual representation of the project schedule, showing the sequence of tasks, dependencies, and deadlines. It is a powerful tool that helps project managers to plan, track, and control the project progress. A good project timeline should be clear, concise, and easy to understand, allowing team members to see how their tasks fit into the overall project plan. With a well-planned project timeline, you can identify potential bottlenecks, allocate resources efficiently, and make informed decisions about the project.
Effective project timelines are crucial for achieving project goals. They help to establish a sense of urgency, prioritize tasks, and ensure that everyone is working towards the same objectives. A project timeline also facilitates communication among team members, stakeholders, and clients, ensuring that everyone is informed about the project progress and any changes that may occur. By creating a comprehensive project timeline, you can minimize delays, reduce costs, and improve the overall quality of the project.
Understanding the Importance of a Project Timeline
Benefits of a Project Timeline
A project timeline offers numerous benefits, including: * Improved project planning and control * Enhanced team collaboration and communication * Better resource allocation and utilization * Increased productivity and efficiency * Reduced delays and cost overruns * Improved quality and customer satisfactionTip 1: Define Project Scope and Objectives
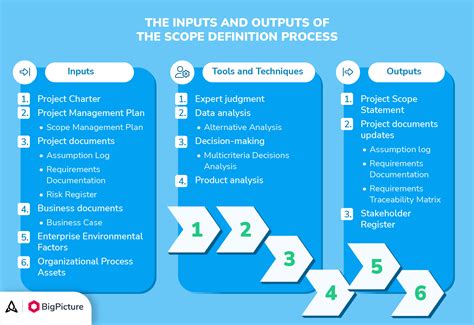
To define the project scope and objectives, you should:
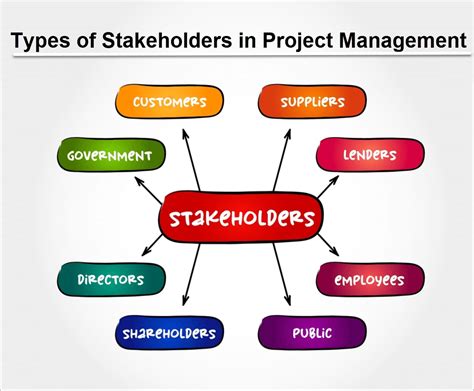
- Identify the project stakeholders and their expectations
- Determine the project goals and deliverables
- Establish the project budget and resource allocation
- Define the project timelines and milestones
- Identify potential risks and mitigation strategies
Best Practices for Defining Project Scope
When defining the project scope, you should: * Be clear and concise about the project objectives * Establish a shared understanding of the project goals and deliverables * Identify and document the project constraints and assumptions * Develop a comprehensive project scope statement * Review and revise the project scope statement as necessaryTip 2: Break Down the Project into Tasks
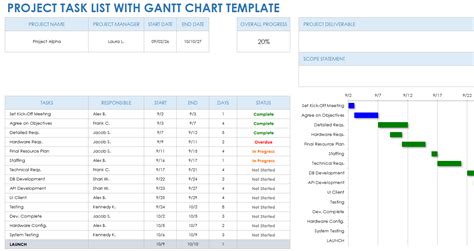
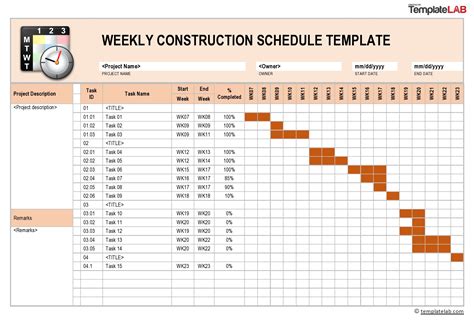
To break down the project into tasks, you should:
- Identify the major project milestones and deadlines
- Determine the specific tasks and activities required to complete each milestone
- Establish the task dependencies and critical path
- Allocate resources and assign tasks to team members
- Develop a comprehensive project schedule
Techniques for Breaking Down Project Tasks
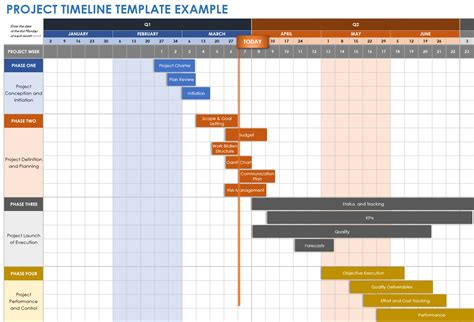
When breaking down the project into tasks, you can use various techniques, such as: * Work breakdown structure (WBS) * Gantt charts * Mind mapping * Task lists and to-do lists * Agile project management methodologiesTip 3: Establish a Project Schedule
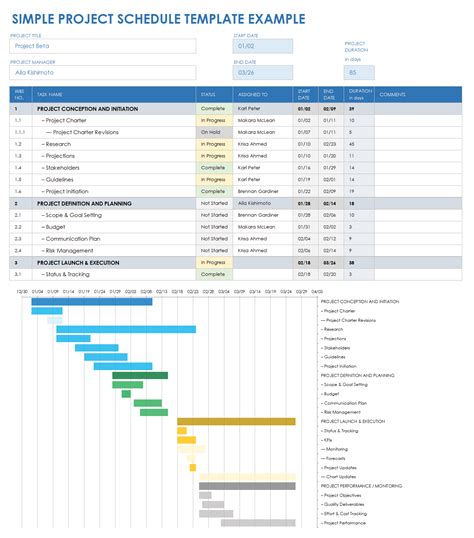
To establish a project schedule, you should:
- Determine the project start and end dates
- Identify the key milestones and deadlines
- Establish the task dependencies and critical path
- Allocate resources and assign tasks to team members
- Develop a comprehensive project schedule
Tools for Establishing a Project Schedule
When establishing a project schedule, you can use various tools, such as: * Project management software (e.g., Asana, Trello, MS Project) * Gantt charts and timelines * Calendars and scheduling tools * Spreadsheets and tables * Agile project management methodologiesTip 4: Identify and Mitigate Risks
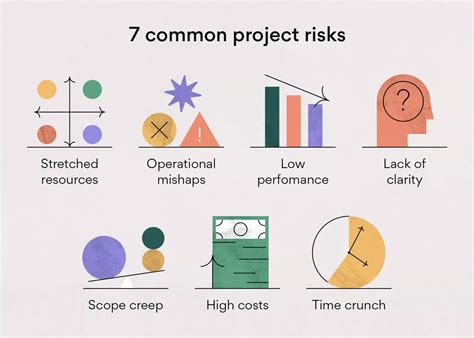
To identify and mitigate risks, you should:
- Identify potential risks and assess their likelihood and impact
- Develop contingency plans and mitigation strategies
- Allocate resources and assign tasks to team members
- Monitor and review the project progress regularly
- Update the project schedule and risk register as necessary
Techniques for Identifying and Mitigating Risks
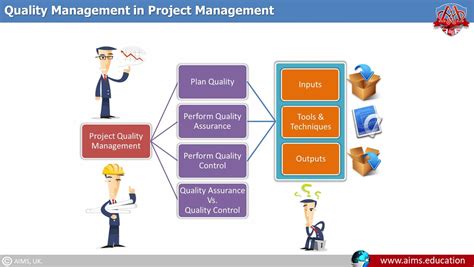
When identifying and mitigating risks, you can use various techniques, such as: * Risk assessment and analysis * SWOT analysis * Decision trees and fishbone diagrams * Contingency planning and scenario planning * Agile project management methodologiesTip 5: Monitor and Control the Project Progress
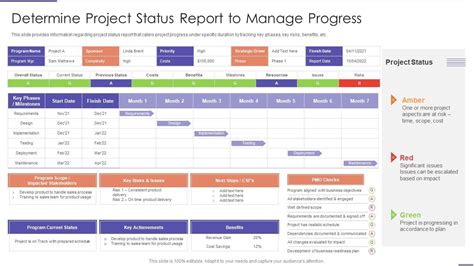
To monitor and control the project progress, you should:
- Track the project schedule, budget, and quality regularly
- Identify and address any issues that may arise
- Update the project schedule and risk register as necessary
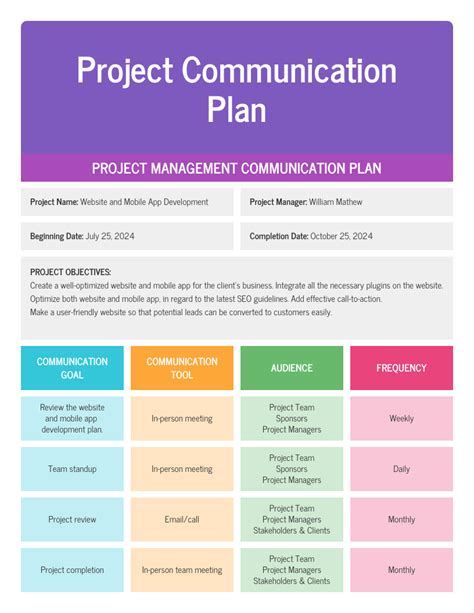
- Communicate with team members, stakeholders, and clients regularly
- Review and evaluate the project progress at the end of the project
Tools for Monitoring and Controlling Project Progress
When monitoring and controlling the project progress, you can use various tools, such as: * Project management software (e.g., Asana, Trello, MS Project) * Gantt charts and timelines * Spreadsheets and tables * Status reports and progress updates * Agile project management methodologiesProject Timeline Image Gallery
What is a project timeline?
+A project timeline is a visual representation of the project schedule, showing the sequence of tasks, milestones, and deadlines.
Why is a project timeline important?
+A project timeline is important because it helps to outline the tasks, milestones, and deadlines, ensuring that everyone involved is on the same page.
How do I create a project timeline?
+To create a project timeline, you should define the project scope and objectives, break down the project into tasks, establish a project schedule, identify and mitigate risks, and monitor and control the project progress.
What are the benefits of a project timeline?
+The benefits of a project timeline include improved project planning and control, enhanced team collaboration and communication, better resource allocation and utilization, increased productivity and efficiency, reduced delays and cost overruns, and improved quality and customer satisfaction.
What tools can I use to create a project timeline?
+You can use various tools to create a project timeline, such as project management software, Gantt charts and timelines, spreadsheets and tables, and agile project management methodologies.
In conclusion, creating a project timeline is a crucial step in ensuring the success of any project. By defining the project scope and objectives, breaking down the project into tasks, establishing a project schedule, identifying and mitigating risks, and monitoring and controlling the project progress, you can create a comprehensive project timeline that helps to ensure the project is completed on time, within budget, and to the required quality standards. We hope that the tips and best practices outlined in this article have been helpful in guiding you through the process of creating a project timeline. If you have any further questions or would like to share your own experiences with project timelines, please don't hesitate to comment below.