
Intro
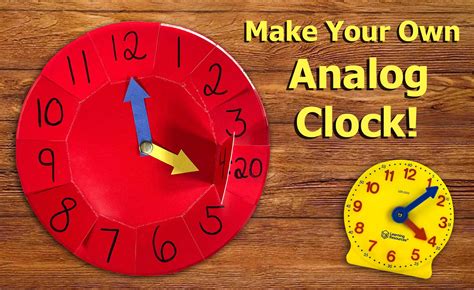
Discover 5 free clock plans, featuring DIY woodworking projects with easy-to-follow instructions, including wall clock, grandfather clock, and mantle clock designs, perfect for beginners and experienced woodworkers alike.
Creating a clock from scratch can be a rewarding DIY project, offering a unique opportunity to combine functionality with personal style. Whether you're a seasoned woodworker or a beginner looking to hone your skills, having the right plans can make all the difference. Here, we'll explore five free clock plans that cater to various tastes and skill levels, helping you find the perfect project to adorn your walls or gift to loved ones.
The importance of having detailed plans for a DIY clock project cannot be overstated. It not only ensures that your project turns out as envisioned but also helps in managing time and resources more efficiently. Each of the plans discussed below has been selected for its clarity, creativity, and the value it adds to any room in your home. From modern and sleek designs to traditional and intricate ones, there's something for everyone.
The process of making a clock can be quite therapeutic, allowing you to express your creativity while working with your hands. It's an excellent way to learn new skills, such as woodworking, or to refine existing ones. Moreover, the sense of accomplishment you'll feel upon completing your project is unparalleled, making every moment spent on it worthwhile.
Introduction to Clock Making
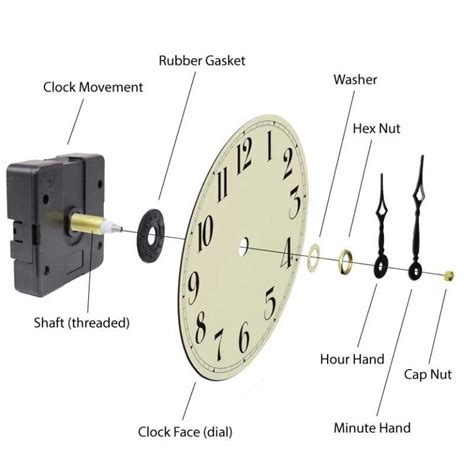
For those new to clock making, it's essential to understand the basic components and mechanisms involved. A clock typically consists of a face, hands, a mechanism (either quartz or mechanical), and a housing. The face of the clock displays the hours and minutes, while the hands (hour, minute, and sometimes second) rotate to indicate time. The mechanism powers the movement of these hands, and the housing encloses and protects the mechanism while also providing a mount for the clock face.
Plan 1: Modern Wall Clock
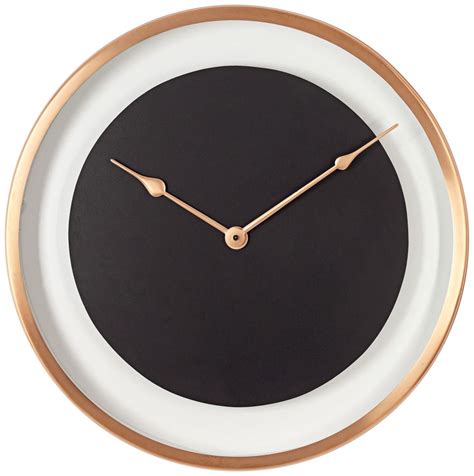
The first plan is for a modern wall clock that exudes simplicity and elegance. Made from a single piece of wood, this clock features a minimalist design that can complement any interior decor. The plan includes detailed instructions on how to cut out the clock face, assemble the mechanism, and attach the hands. It's an excellent project for beginners, requiring minimal tools and materials.
Materials Needed:
- 1 piece of wood (for the clock face) - 1 clock mechanism - Clock hands - Paint or varnish - A drill - SandpaperSteps to Follow:
1. Cut out the clock face from the wood according to the desired size and shape. 2. Sand the wood to achieve a smooth finish. 3. Paint or varnish the clock face as desired. 4. Assemble the clock mechanism according to the manufacturer's instructions. 5. Attach the clock hands to the mechanism.Plan 2: Rustic Wooden Clock
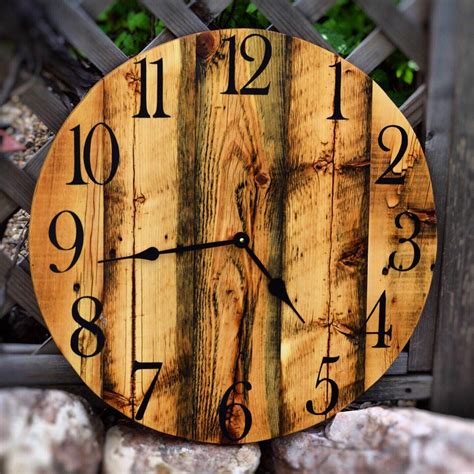
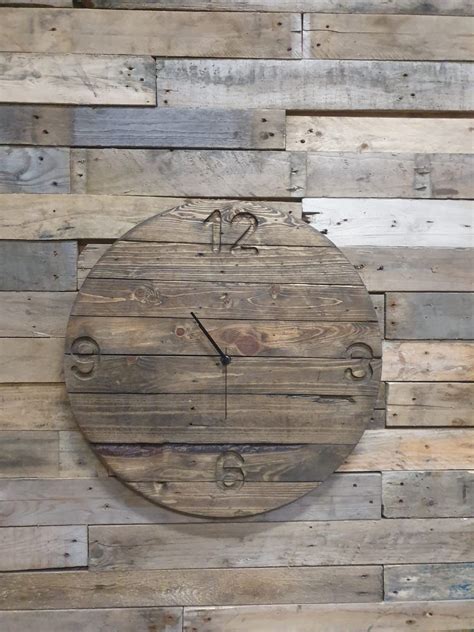
For those who prefer a more traditional and rustic look, the second plan offers a design that incorporates natural wood textures and earthy tones. This clock features a unique blend of modern functionality with a vintage aesthetic, making it a standout piece in any room. The plan includes tips on how to distress the wood for a more authentic look and how to add decorative elements such as carvings or metal accents.
Materials Needed:
- Wooden planks (for the clock face and frame) - Clock mechanism - Clock hands - Wood glue - Nails or screws - Distressing tools (optional)Steps to Follow:
1. Cut the wooden planks to the required size for the clock face and frame. 2. Assemble the frame using wood glue and nails or screws. 3. Attach the clock mechanism to the back of the clock face. 4. Distress the wood to achieve a rustic look, if desired. 5. Add decorative elements such as carvings or metal accents.Plan 3: Geometric Clock
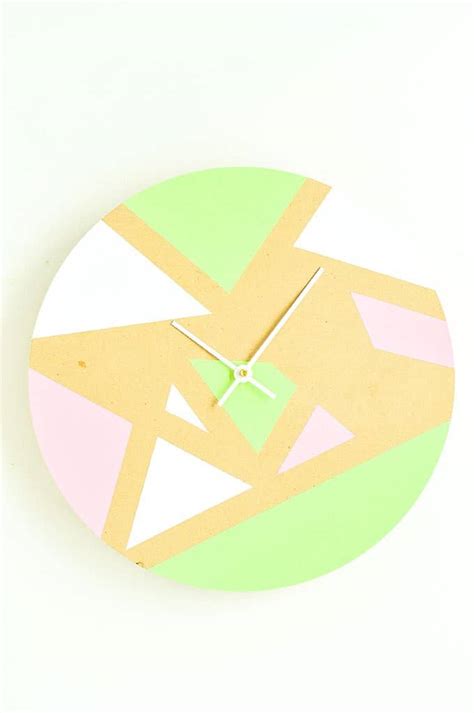
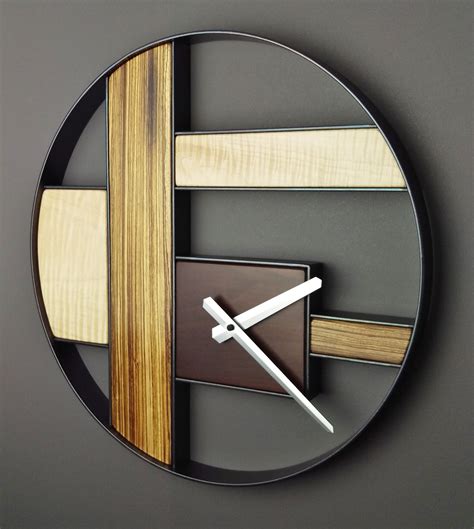
The third plan is for a geometric clock that adds a touch of modernity and sophistication to any room. This design features a unique geometric pattern on the clock face, created using small pieces of wood or other materials. The plan provides a template for the geometric pattern and instructions on how to assemble the pieces to form the clock face.
Materials Needed:
- Small pieces of wood (for the geometric pattern) - Clock mechanism - Clock hands - Wood glue - A drill - SandpaperSteps to Follow:
1. Cut the small pieces of wood according to the geometric pattern template. 2. Assemble the pieces to form the clock face using wood glue. 3. Sand the clock face to achieve a smooth finish. 4. Attach the clock mechanism to the back of the clock face. 5. Add the clock hands.Plan 4: Reclaimed Wood Clock
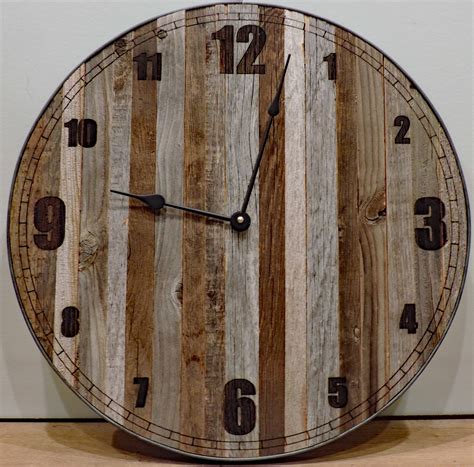
For those who are environmentally conscious and appreciate the beauty of reclaimed wood, the fourth plan offers a design that transforms old wood into a stunning clock. This project not only reduces waste but also results in a unique piece of art that tells a story. The plan includes advice on where to find reclaimed wood and how to restore it for use in the clock.
Materials Needed:
- Reclaimed wood (for the clock face and frame) - Clock mechanism - Clock hands - Wood glue - Nails or screws - SandpaperSteps to Follow:
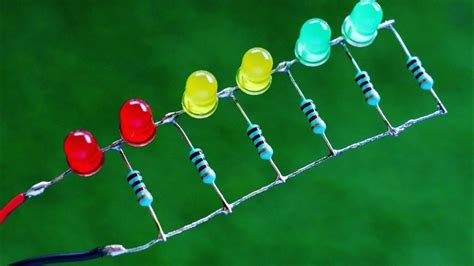
1. Source reclaimed wood and restore it for use. 2. Cut the reclaimed wood to the required size for the clock face and frame. 3. Assemble the frame using wood glue and nails or screws. 4. Attach the clock mechanism to the back of the clock face. 5. Add the clock hands.Plan 5: LED Clock
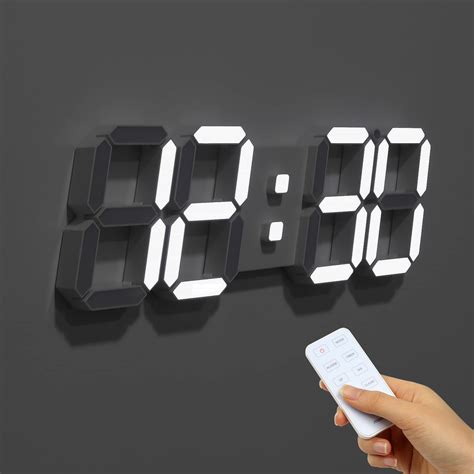
The fifth and final plan is for an LED clock that combines technology with creativity. This modern design features LED lights that illuminate the clock face, creating a mesmerizing effect. The plan includes instructions on how to set up the LED lights and program them to display the time in a unique and captivating way.
Materials Needed:
- LED lights - Clock mechanism - Microcontroller (for programming the LED lights) - Power source - Wire - A drillSteps to Follow:
1. Set up the LED lights according to the desired pattern. 2. Program the microcontroller to display the time using the LED lights. 3. Connect the LED lights to the power source. 4. Attach the clock mechanism to the back of the clock face. 5. Add the clock hands.DIY Clock Image Gallery


What materials are needed for a basic clock project?
+The basic materials needed include a clock mechanism, clock hands, a piece of wood or other material for the clock face, and tools such as a drill and sandpaper.
How do I assemble a clock mechanism?
+Assembling a clock mechanism typically involves attaching the clock hands to the mechanism and then securing the mechanism to the back of the clock face. It's essential to follow the manufacturer's instructions for the specific mechanism you're using.
What are some creative ways to decorate a clock face?
+There are numerous ways to decorate a clock face, including painting, adding stickers or decals, using stencils, or even creating a mosaic pattern with small tiles or pieces of wood.
In conclusion, these five free clock plans offer a wide range of possibilities for DIY enthusiasts, from modern and sleek designs to traditional and rustic ones. Whether you're looking to create a unique piece of home decor or a thoughtful gift, there's a plan here to suit your tastes and skills. Remember, the key to a successful DIY project is patience and attention to detail, so don't hesitate to take your time and enjoy the process of creating something truly special. We invite you to share your own DIY clock making experiences, ask questions, or suggest more ideas in the comments below. Your feedback and engagement are invaluable to us, and we look forward to hearing about your creative endeavors.