
Intro
Discover 5 ways to create an Excel bell curve, mastering data distribution, statistical analysis, and visualization techniques with normal distribution, standard deviation, and mean calculations.
Understanding and applying the concept of a bell curve in Excel can be incredibly powerful for data analysis. The bell curve, also known as the normal distribution or Gaussian distribution, is a probability distribution that is symmetric about the mean, showing that data near the mean are more frequent in occurrence than data far from the mean. In Excel, creating and analyzing a bell curve can help in understanding the distribution of data, identifying outliers, and making predictions. Here are five ways to work with a bell curve in Excel:
The bell curve is a fundamental concept in statistics and is widely used in various fields such as finance, engineering, and social sciences. It is essential to understand how to create and analyze a bell curve in Excel to make informed decisions based on data analysis.
Introduction to Bell Curve in Excel
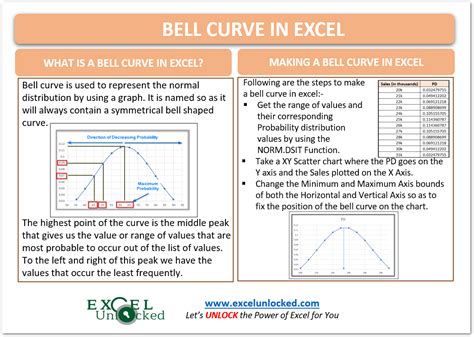
Creating a Bell Curve Using Formulas
Here are the steps to create a bell curve using formulas:
- Enter your data in a column.
- Calculate the mean and standard deviation of your data.
- Use the NORM.DIST function to calculate the normal distribution for each value.
- Plot the values to create the bell curve.
Step-by-Step Guide to Creating a Bell Curve Using Formulas
- Enter Data: Start by entering your dataset into a column in Excel.
- Calculate Mean and Standard Deviation: Use the AVERAGE and STDEV functions to calculate the mean and standard deviation of your data.
- Use NORM.DIST Function: Apply the NORM.DIST function to calculate the normal distribution for each data point.
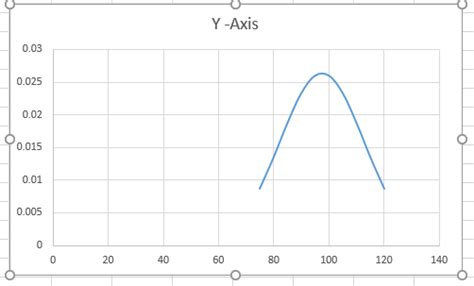
- Plot the Bell Curve: Use the calculated values to plot the bell curve, which can be done using a line chart or a scatter plot.
Using Excel Charts to Visualize the Bell Curve
Here’s how to create a bell curve using Excel charts:
- Prepare your data by calculating the frequency of each value.
- Insert a chart, such as a histogram or a column chart, depending on your data.
- Customize the chart to better represent the bell curve.
Customizing the Chart for Better Representation
- Select Chart Type: Choose a chart type that best represents your data, such as a histogram for continuous data.
- Adjust Axis: Adjust the x-axis and y-axis to ensure the curve is centered and symmetrical.
- Add Trendline: Consider adding a trendline to highlight the bell curve shape.
Utilizing Excel Add-ins for Advanced Bell Curve Analysis

Benefits of Using Excel Add-ins
- Simplified Calculations: Add-ins can automate complex statistical calculations.
- Advanced Visualizations: They offer a variety of chart types and customization options for better data visualization.
- Efficiency: Using add-ins can save time and effort in data analysis.
Applying the Bell Curve in Real-World Scenarios

Examples of Real-World Applications
- Quality Control: To monitor the quality of products and identify any deviations from the standard.
- Finance: To analyze stock prices and predict future market trends.
- Social Sciences: To understand population distribution and trends.
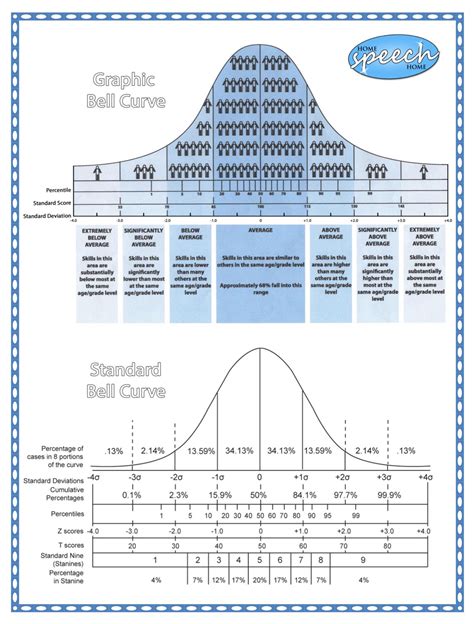
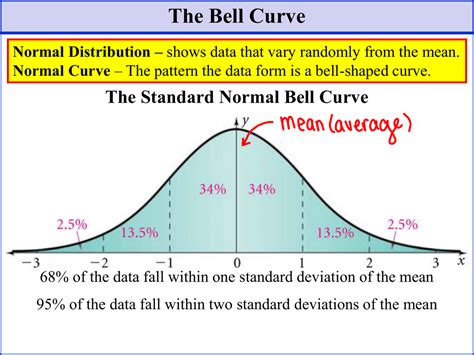
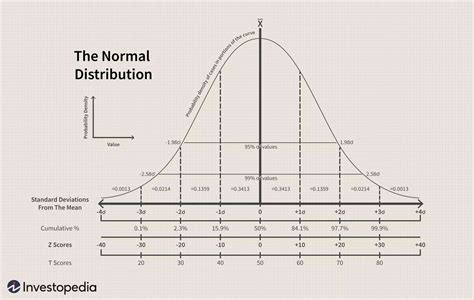
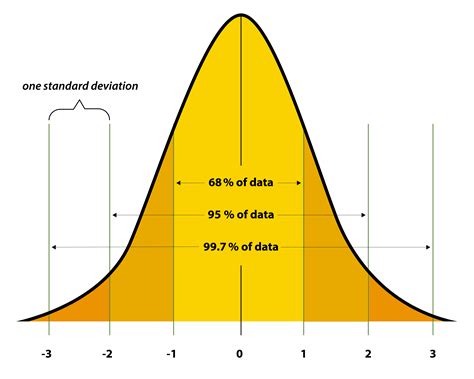
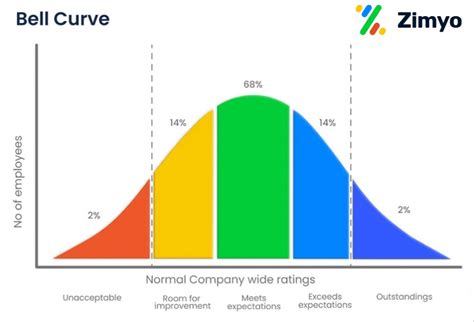
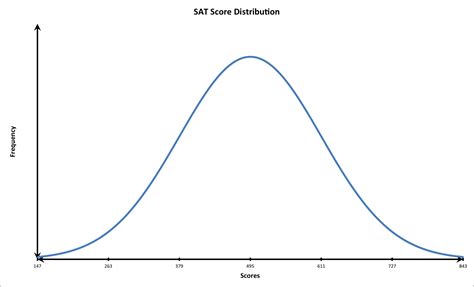
Gallery of Bell Curve Examples
Bell Curve Image Gallery


Frequently Asked Questions About Bell Curve in Excel
What is the Bell Curve in Excel?
+The bell curve, or normal distribution, is a statistical concept that describes how data points are distributed around the mean. In Excel, it can be created and analyzed using formulas, charts, and add-ins.
How Do I Create a Bell Curve in Excel?
+To create a bell curve in Excel, you can use the NORM.DIST function, create a histogram, or use Excel add-ins like Analysis ToolPak. The method you choose depends on your data and the level of analysis you need.
What Are the Applications of the Bell Curve?
+The bell curve has applications in quality control, finance, social sciences, and more. It helps in understanding data distribution, predicting trends, and making informed decisions.
Can I Use Excel Add-ins for Bell Curve Analysis?
+Yes, Excel add-ins like Analysis ToolPak and third-party plugins can simplify the process of creating and analyzing a bell curve. They offer advanced statistical functions and visualization tools.
How Does the Bell Curve Help in Data Analysis?
+The bell curve helps in understanding how data points distribute around the mean, identifying outliers, and predicting future trends. It’s a powerful tool for data analysis and decision-making.
In conclusion, mastering the bell curve in Excel can significantly enhance your data analysis capabilities. Whether you're using formulas, charts, or add-ins, understanding and applying the concept of the bell curve can provide valuable insights into your data. By following the steps and tips outlined in this article, you can effectively create and analyze a bell curve in Excel, leading to better decision-making and more accurate predictions. We invite you to share your experiences with the bell curve in Excel, ask questions, or explore more advanced topics in data analysis. Your feedback and engagement are invaluable in creating a community that learns and grows together.