
Intro
Create a professional batting box with our DIY batters box template guide, featuring step-by-step instructions, baseball field dimensions, and softball layouts for a perfect pitch.
Creating a DIY batters box template can be a fun and rewarding project for baseball and softball enthusiasts. A batters box is a rectangular area marked on the ground where the batter stands during a game. Having a well-designed and accurately marked batters box is essential for a fair and enjoyable game. In this article, we will provide a comprehensive guide on how to create a DIY batters box template.
The importance of a well-marked batters box cannot be overstated. It helps to ensure that the batter is standing in the correct position, which can affect the outcome of the game. A DIY batters box template can be used to mark the batters box on various surfaces, including grass, dirt, and artificial turf. With a DIY template, you can create a professional-looking batters box that meets the official regulations of the game.
Before we dive into the step-by-step guide, let's take a look at the benefits of creating a DIY batters box template. One of the main advantages is that it can be customized to fit your specific needs. You can choose the size, shape, and design of the template to suit your preferences. Additionally, a DIY template can be more cost-effective than purchasing a pre-made template. With a little creativity and some basic materials, you can create a high-quality batters box template that will last for a long time.
Materials Needed
Step-by-Step Instructions
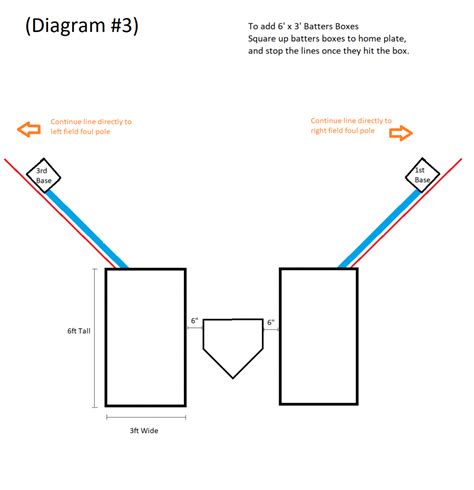
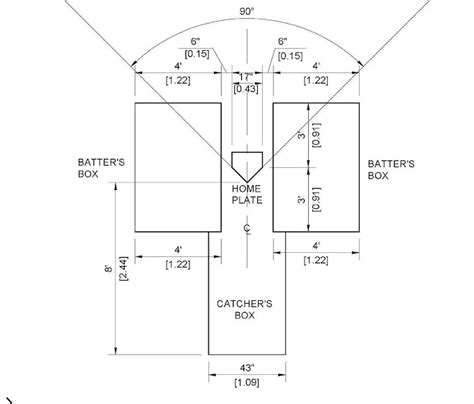
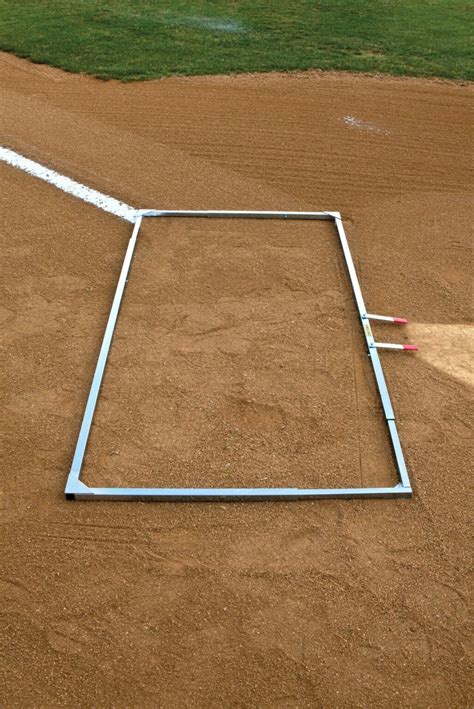
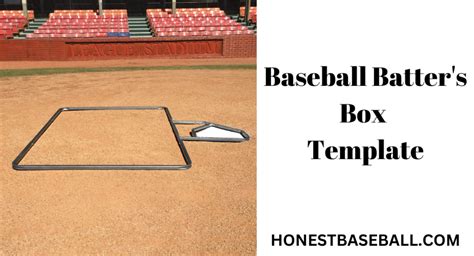
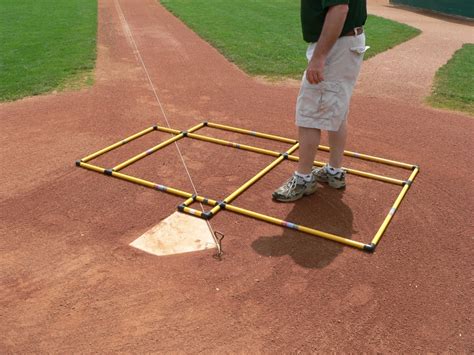
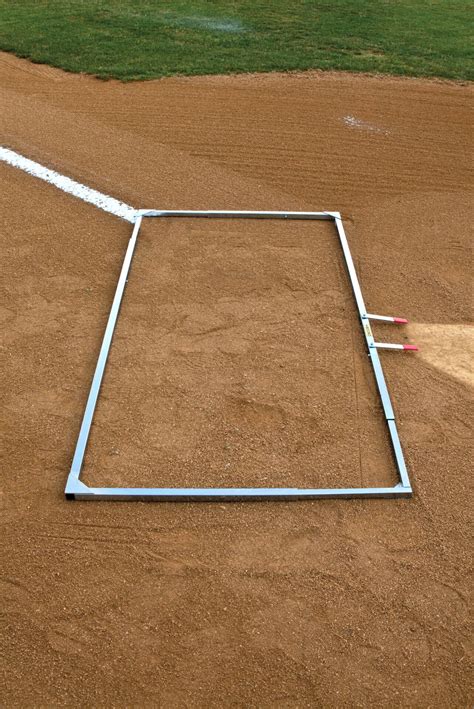
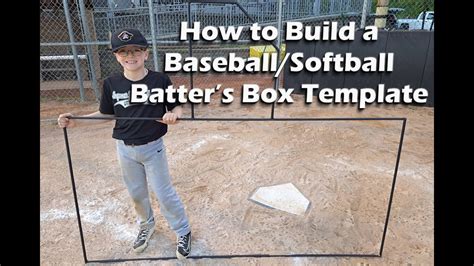
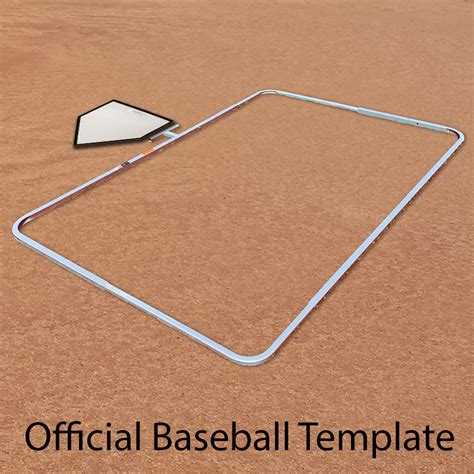
The first step in creating a DIY batters box template is to determine the size of the template. The official regulations for baseball and softball specify that the batters box should be 6 feet long and 4 feet wide. However, you can adjust the size of the template to fit your specific needs.Once you have determined the size of the template, you can begin cutting out the cardboard or plywood. Use a ruler or straightedge to draw a rectangular shape on the material, and then use a cutting tool to cut out the shape. Make sure to cut carefully and accurately, as the template will be used to mark the batters box on the ground.
Design Considerations

Another consideration is the material used to create the template. Cardboard or plywood are good options, as they are sturdy and can withstand repeated use. You can also use other materials, such as plastic or metal, but these may be more expensive and difficult to work with.
Marking the Batters Box
Once you have created your DIY batters box template, you can use it to mark the batters box on the ground. Begin by placing the template on the ground and using a pencil or marker to mark the outline of the template. Make sure to use a level to ensure that the template is level and accurate.Next, use a measuring tape to measure the distance between the batters box and the pitcher's mound. The official regulations specify that the distance between the batters box and the pitcher's mound should be 60.5 feet for baseball and 40 feet for softball.
Benefits of a DIY Batters Box Template
Another benefit is that a DIY template can be more cost-effective than purchasing a pre-made template. With a little creativity and some basic materials, you can create a high-quality batters box template that will last for a long time.
Common Mistakes to Avoid
When creating a DIY batters box template, there are several common mistakes to avoid. One of the most common mistakes is using a template that is not accurate or level. This can result in a batters box that is not marked correctly, which can affect the outcome of the game.Another mistake is using a material that is not sturdy or durable. Cardboard or plywood are good options, as they are sturdy and can withstand repeated use. Avoid using materials that are flimsy or prone to tearing, as these can be difficult to work with and may not produce accurate results.
Tips and Variations

Another variation is to use a template that is reusable, so that you can use it multiple times without having to recreate it. This can be especially useful if you plan to use the template for multiple games or events.
Conclusion and Final Thoughts
In conclusion, creating a DIY batters box template is a fun and rewarding project that can be customized to fit your specific needs. With a little creativity and some basic materials, you can create a high-quality batters box template that will last for a long time.By following the step-by-step guide and tips outlined in this article, you can create a DIY batters box template that meets the official regulations of the game. Remember to use a sturdy and durable material, and to ensure that the template is accurate and level.
Gallery of DIY Batters Box Templates
DIY Batters Box Template Image Gallery


What is the official size of a batters box?
+The official size of a batters box is 6 feet long and 4 feet wide.
What materials can be used to create a DIY batters box template?
+Cardboard, plywood, plastic, and metal are all suitable materials for creating a DIY batters box template.
How do I ensure that my DIY batters box template is accurate and level?
+Use a level and a measuring tape to ensure that your DIY batters box template is accurate and level.
Can I customize my DIY batters box template to fit my specific needs?
+Yes, you can customize your DIY batters box template to fit your specific needs by adjusting the size, shape, and design of the template.
How do I mark the batters box on the ground using my DIY template?
+Place the template on the ground and use a pencil or marker to mark the outline of the template. Use a level to ensure that the template is level and accurate.
We hope that this comprehensive guide has provided you with the information and inspiration you need to create your own DIY batters box template. Whether you're a seasoned baseball or softball player or just starting out, a well-designed and accurately marked batters box is essential for a fair and enjoyable game. With a little creativity and some basic materials, you can create a high-quality batters box template that will last for a long time. So why not get started today and create your own DIY batters box template? Share your experiences and tips with us in the comments below, and don't forget to share this article with your friends and family who may be interested in creating their own DIY batters box template.