
Intro
Discover expert 5 Cricut Insert Card Tips for crafting flawless greeting cards, including paper selection, fold techniques, and design optimization with Cricut machines and tools.
The world of Cricut crafting is vast and exciting, offering countless opportunities for creativity and self-expression. One of the most delightful aspects of Cricut crafting is the ability to create beautiful and personalized insert cards for various occasions. Whether you're making a birthday card, a wedding invitation, or a simple thank-you note, Cricut insert cards can add a touch of elegance and sophistication to your designs. In this article, we will delve into the world of Cricut insert cards, exploring five essential tips to help you get the most out of your Cricut machine and create stunning insert cards that will impress your friends and family.
Cricut insert cards are a fantastic way to add an extra layer of personalization to your cards and invitations. With the help of your Cricut machine, you can cut out intricate designs, patterns, and shapes to create unique and eye-catching insert cards. However, working with insert cards can be a bit tricky, especially if you're new to Cricut crafting. That's why it's essential to have some tips and tricks up your sleeve to ensure that your insert cards turn out perfectly. From choosing the right materials to mastering the art of folding and assembling, we'll cover everything you need to know to create beautiful and professional-looking Cricut insert cards.
The art of creating Cricut insert cards is all about experimentation and practice. With a little patience and creativity, you can create stunning insert cards that will elevate your cards and invitations to the next level. Whether you're a seasoned crafter or just starting out, these five tips will help you unlock the full potential of your Cricut machine and create insert cards that are truly unforgettable. So, let's dive in and explore the world of Cricut insert cards, shall we?
Understanding the Basics of Cricut Insert Cards

Choosing the Right Materials
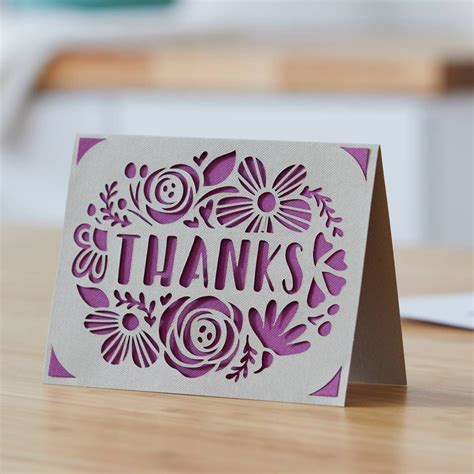
When it comes to creating Cricut insert cards, the materials you choose can make all the difference. You'll want to select papers and cardstocks that are compatible with your Cricut machine and that will hold up well to cutting and folding. Some popular materials for Cricut insert cards include: * Cardstock: A sturdy, thick paper that is perfect for creating intricate designs and shapes. * Patterned paper: A decorative paper with a printed design or pattern that can add visual interest to your insert cards. * Vellum: A translucent paper that can be used to create beautiful, layered designs. * Foil paper: A paper with a metallic finish that can add a touch of luxury to your insert cards.Tips for Creating Beautiful Cricut Insert Cards

Common Mistakes to Avoid
When creating Cricut insert cards, there are a few common mistakes to avoid. These include: * Using the wrong materials: Make sure to choose materials that are compatible with your Cricut machine and that will hold up well to cutting and folding. * Not adjusting the settings: Fail to adjust the settings on your Cricut machine to match the type of material you're using and the complexity of your design. * Not paying attention to folding and assembly: Take the time to fold and assemble your insert card carefully, using a bone folder and strong adhesive to create a crisp fold and secure the insert card in place.Advanced Techniques for Cricut Insert Cards
Getting Creative with Cricut Insert Cards
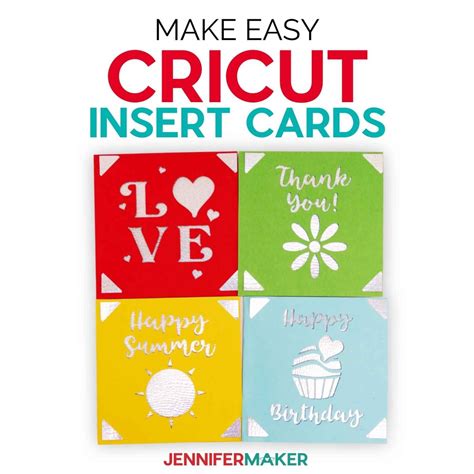
The possibilities are endless when it comes to creating Cricut insert cards. You can use your Cricut machine to cut out intricate designs, shapes, and patterns, and then assemble them into unique and beautiful insert cards. Some ideas for getting creative with Cricut insert cards include: * **Using different materials**: Experiment with different materials, such as vellum, foil paper, or patterned paper, to create unique and interesting designs. * **Adding embellishments**: Use items like rhinestones, stickers, or die-cuts to add visual interest and create a unique design. * **Creating custom designs**: Use the Cricut Design Space software to create custom designs and shapes for your insert cards.Gallery of Cricut Insert Card Designs
Cricut Insert Card Designs


What is a Cricut insert card?
+A Cricut insert card is a separate piece of paper or cardstock that is inserted into a card or invitation to add an extra layer of design and personalization.
What materials can I use to create Cricut insert cards?
+You can use a variety of materials to create Cricut insert cards, including cardstock, patterned paper, vellum, and foil paper.
How do I assemble a Cricut insert card?
+To assemble a Cricut insert card, you'll need to fold and glue the cut-out design into place. Use a bone folder to create a crisp fold, and a strong adhesive to secure the insert card in place.
Can I use my Cricut machine to cut out intricate designs for my insert cards?
+Yes, you can use your Cricut machine to cut out intricate designs for your insert cards. Simply use the Cricut Design Space software to create your design, and then cut it out using your Cricut machine.
How can I add embellishments to my Cricut insert cards?
+You can add embellishments to your Cricut insert cards using items like rhinestones, stickers, or die-cuts. Simply apply the embellishments to your insert card using a strong adhesive.
In conclusion, creating Cricut insert cards is a fun and rewarding hobby that can add a personal touch to your cards and invitations. With these five tips and tricks, you'll be well on your way to creating beautiful and professional-looking insert cards that will impress your friends and family. Remember to experiment with different materials, designs, and embellishments to create unique and eye-catching insert cards. Don't be afraid to try new things and make mistakes – it's all part of the creative process! We hope you've enjoyed this article and found it helpful in your Cricut crafting journey. If you have any questions or comments, please don't hesitate to reach out. Happy crafting!