
Intro
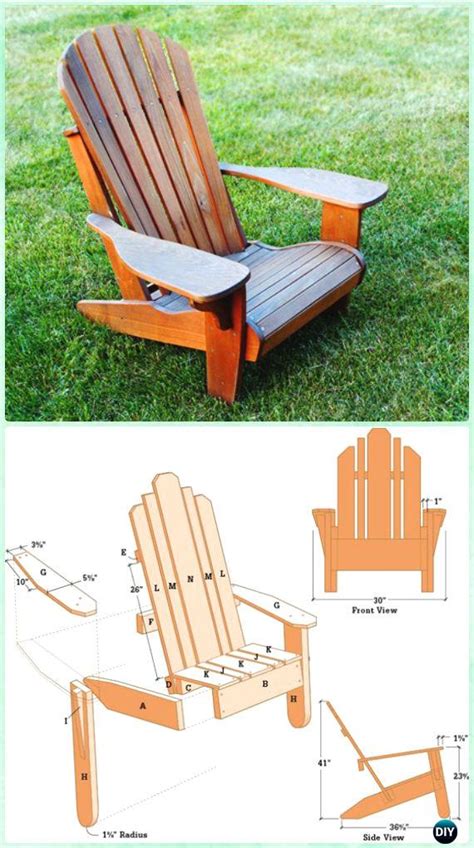
Build your dream outdoor seat with Adirondack Chairs Plans Templates, featuring DIY designs, wooden layouts, and patio furniture blueprints for a comfortable seating experience.
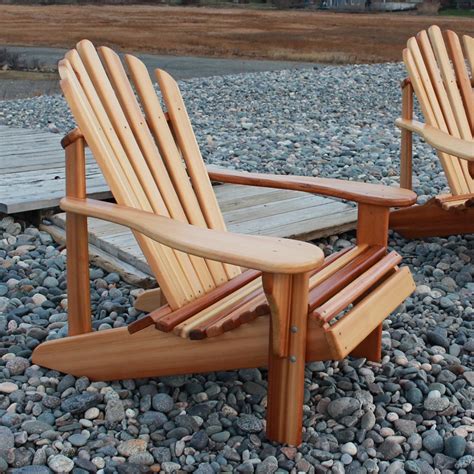
The Adirondack chair, a classic piece of outdoor furniture that has been a staple in many backyards and gardens for decades. Its unique design, which features a wide, flat seat and a high back, makes it the perfect spot to relax and enjoy the great outdoors. If you're looking to add one of these beautiful chairs to your outdoor space, you may be considering building one yourself. With the right plans and templates, you can create a stunning Adirondack chair that will provide you with years of comfort and relaxation.
Building an Adirondack chair can be a fun and rewarding DIY project, but it does require some planning and preparation. Before you start, you'll need to gather the necessary materials and tools, including lumber, screws, and a drill. You'll also need to choose a design and make any necessary adjustments to the plans to fit your specific needs. With the right guidance, however, you can create a beautiful and functional Adirondack chair that will be the envy of all your friends and family.
Introduction to Adirondack Chair Plans

Benefits of Building an Adirondack Chair

Cost-Effective
Building an Adirondack chair can also be a cost-effective option, as you can often purchase the materials at a lower cost than buying a pre-made chair. Additionally, by building the chair yourself, you can avoid the cost of labor and transportation, making the final product even more affordable.Customization
One of the biggest benefits of building an Adirondack chair is the ability to customize the design and materials to fit your specific needs. By choosing the type of wood, the color, and the style, you can ensure that the final product is exactly what you want. This can be especially beneficial if you have a specific theme or style in mind for your outdoor space.Adirondack Chair Plans Templates

Traditional Adirondack Chair Plans
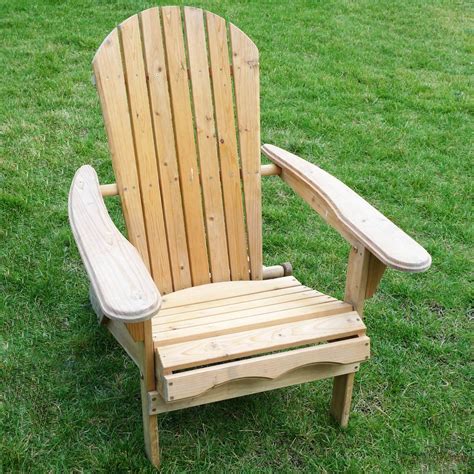
Traditional Adirondack chair plans are a classic design that features a wide, flat seat and a high back. These plans are often simple and easy to follow, making them a great option for beginners. The traditional design is also versatile, allowing you to customize the chair to fit your specific needs.Modern Adirondack Chair Plans
Modern Adirondack chair plans are a more contemporary design that features clean lines and a sleek, minimalist look. These plans are often more complex and may require more advanced skills and tools. However, the final product is well worth the extra effort, as modern Adirondack chairs are a stunning addition to any outdoor space.Steps to Build an Adirondack Chair

- Prepare the materials, including cutting and sanding the wood
- Assemble the frame, including the seat, back, and arms
- Attach the slats, including the seat and back slats
- Add the finishing touches, including sanding and staining the wood
Preparing the Materials
Preparing the materials is the first step in building an Adirondack chair. This includes cutting and sanding the wood, as well as preparing any additional materials, such as screws and nails. It's essential to follow the plans and templates carefully, ensuring that all the materials are cut and prepared correctly.Assembling the Frame
Assembling the frame is the next step in building an Adirondack chair. This includes attaching the seat, back, and arms to the frame, using screws and nails to secure the pieces in place. It's essential to follow the plans and templates carefully, ensuring that the frame is assembled correctly and securely.Tips and Tricks for Building an Adirondack Chair

- Use high-quality materials, including durable wood and weather-resistant finishes
- Follow the plans and templates carefully, ensuring that all the pieces are cut and assembled correctly
- Take your time, working slowly and carefully to ensure that the final product is sturdy and secure
Using High-Quality Materials
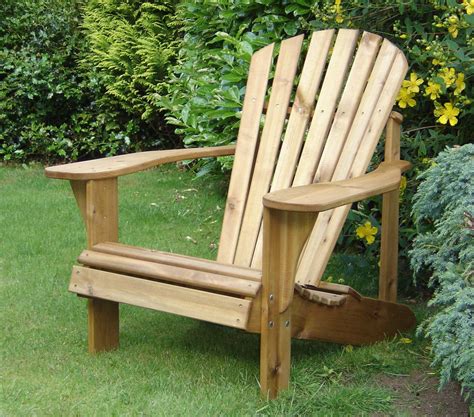
Using high-quality materials is essential when building an Adirondack chair. This includes durable wood, such as cedar or pine, and weather-resistant finishes, such as stain or sealant. By using high-quality materials, you can ensure that the final product is sturdy and secure, able to withstand the elements and provide years of comfort and relaxation.Following the Plans and Templates
Following the plans and templates carefully is also essential when building an Adirondack chair. This includes cutting and assembling the pieces correctly, as well as attaching the slats and adding the finishing touches. By following the plans and templates carefully, you can ensure that the final product is sturdy and secure, able to provide years of comfort and relaxation.Adirondack Chair Image Gallery


What is the best type of wood to use for an Adirondack chair?
+The best type of wood to use for an Adirondack chair is durable and weather-resistant, such as cedar or pine.
How long does it take to build an Adirondack chair?
+The time it takes to build an Adirondack chair depends on the complexity of the design and the level of difficulty, but it can range from a few hours to several days.
What are the benefits of building an Adirondack chair?
+The benefits of building an Adirondack chair include the ability to customize the design and materials, as well as the cost-effectiveness and the fun and rewarding DIY project.
In final thoughts, building an Adirondack chair can be a fun and rewarding DIY project that provides a comfortable and relaxing spot to enjoy the great outdoors. With the right plans and templates, you can create a stunning Adirondack chair that will provide years of comfort and relaxation. Remember to use high-quality materials, follow the plans and templates carefully, and take your time to ensure that the final product is sturdy and secure. By following these tips and tricks, you can create a beautiful and functional Adirondack chair that will be the envy of all your friends and family. So why not get started today and build your own Adirondack chair?